Use Wastage Entry to quickly print multiple labels for the same item — helping you save time when restocking shelves, or replacing damaged tags.
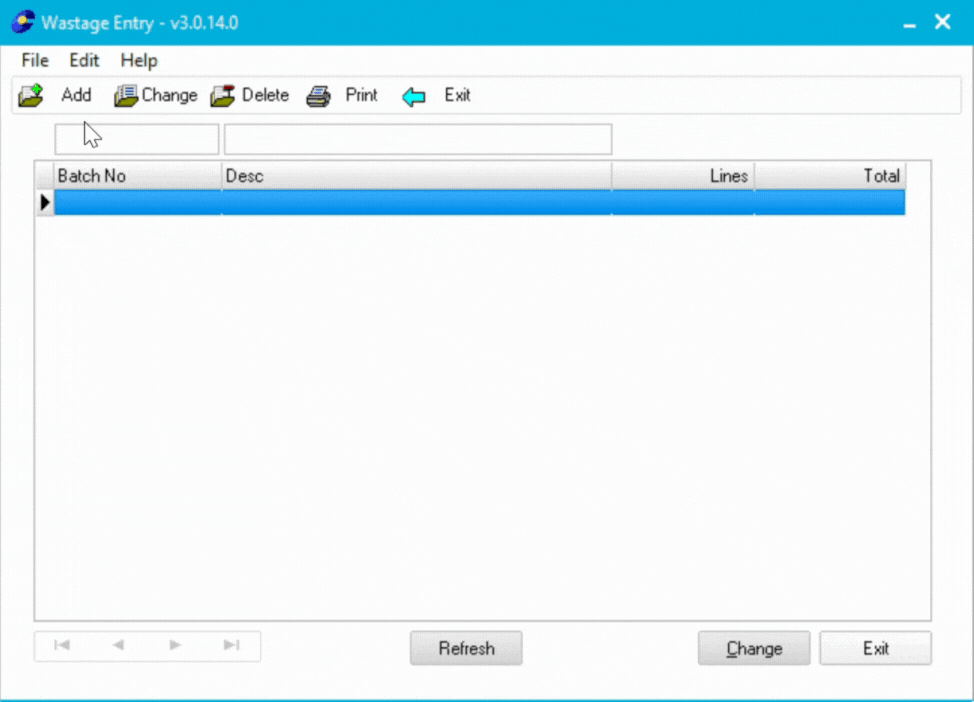
How to create a batch for label printing
-
Go to Inventory → Wastage Entry

-
Select Add to create a new batch.
-
Enter a batch name or number (e.g. LABELS or DAIRYPRINTS), then click OK.
-
-
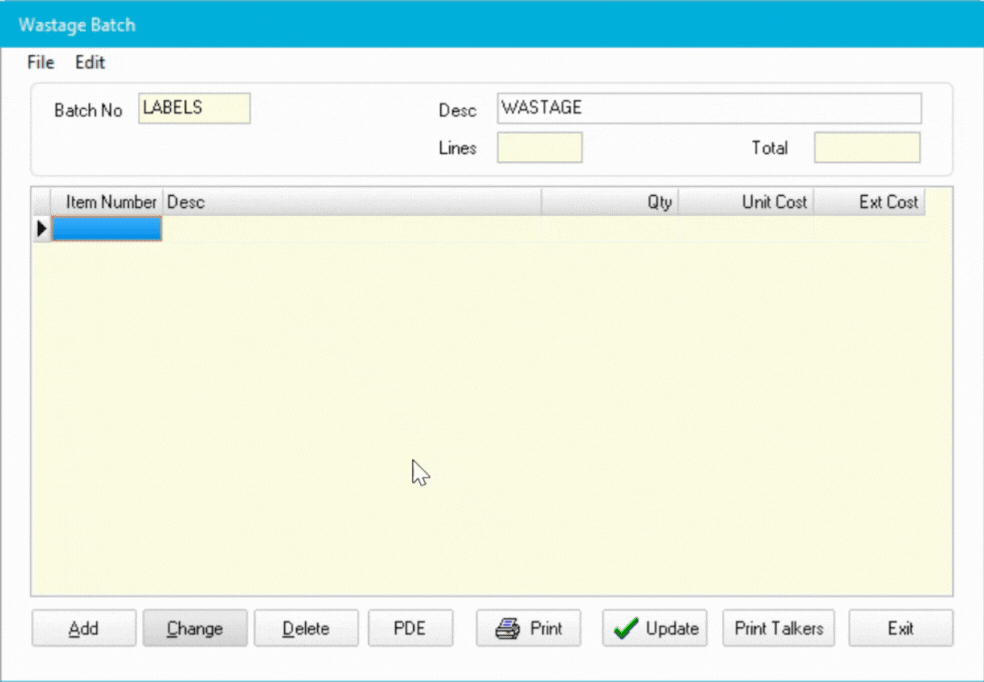
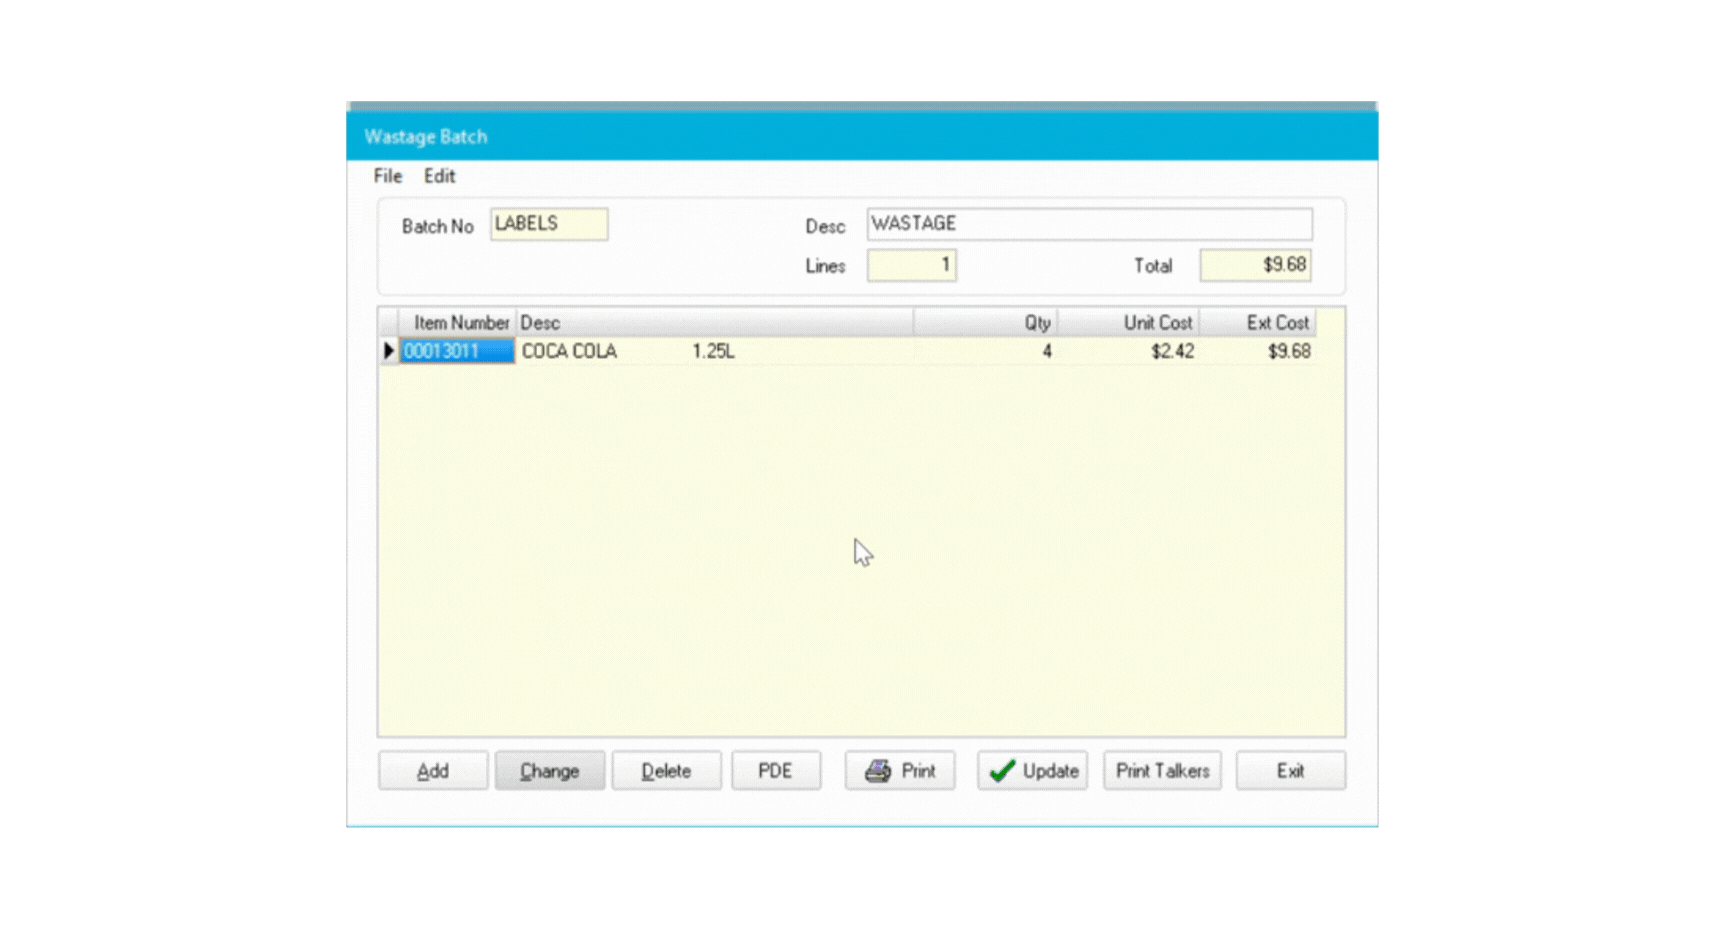
Add items to print
-
Click Add to open the Wastage Item window.
-
Enter the Item Number or use Item Lookup to search by description or barcode (APN).
-
Select your item and click OK.
-
Enter the Quantity — this time, it’s the number of labels you want to print (not wasted items).
-
Click OK twice to confirm.
-
💡 Tip:
You can load items from a wireless or Metcash/Spar PDE. If using a wireless PDE, close the batch completely before scanning, then reopen it when finished.
Review or edit your list
-
-
Double-click to edit an item, or select it and click Change or Delete.
-
(Optional) Click Print to preview your list before printing labels.
-
How to print the labels
-
When your batch is ready, click Print Talkers.
-
In the Print Batch window:
-
Choose your Label Type from the list.
-
(Optional) Tick Only Print Promo Items if you only want promotional labels.
-
-
Click Print to preview the labels.
-
Print as usual, then close the preview — this will delete the batch automatically.
⚠️ Important:
Once you close the label preview, the wastage batch is deleted. Make sure all labels have printed correctly first.