🧾 Creating and Updating a Wastage Batch (Backoffice)
Keeping track of stock wastage helps you maintain accurate inventory and supports automatic ordering.
Use Wastage Entry to record items that are damaged, expired, or unsellable — and update stock levels automatically.
How to create a wastage batch
-
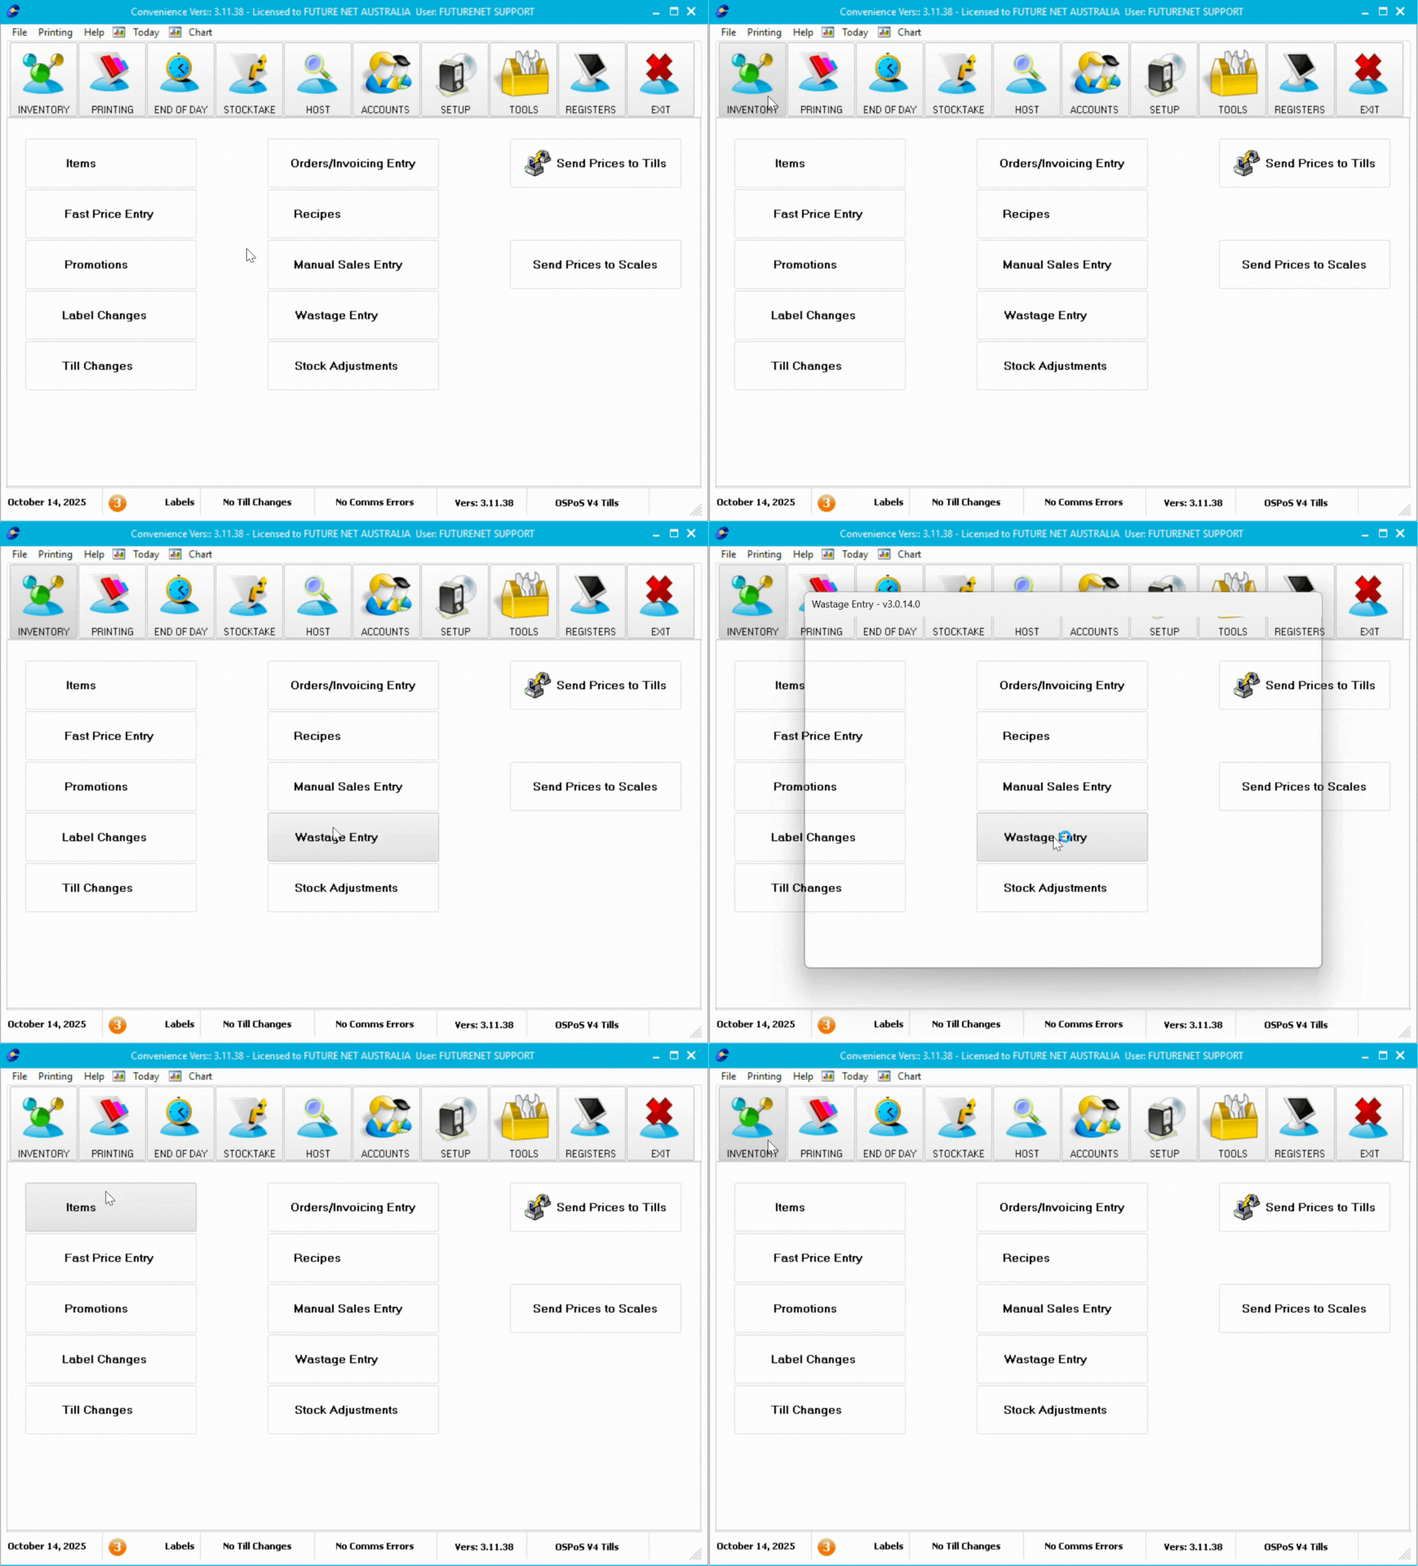
Go to Inventory → Wastage Entry

-
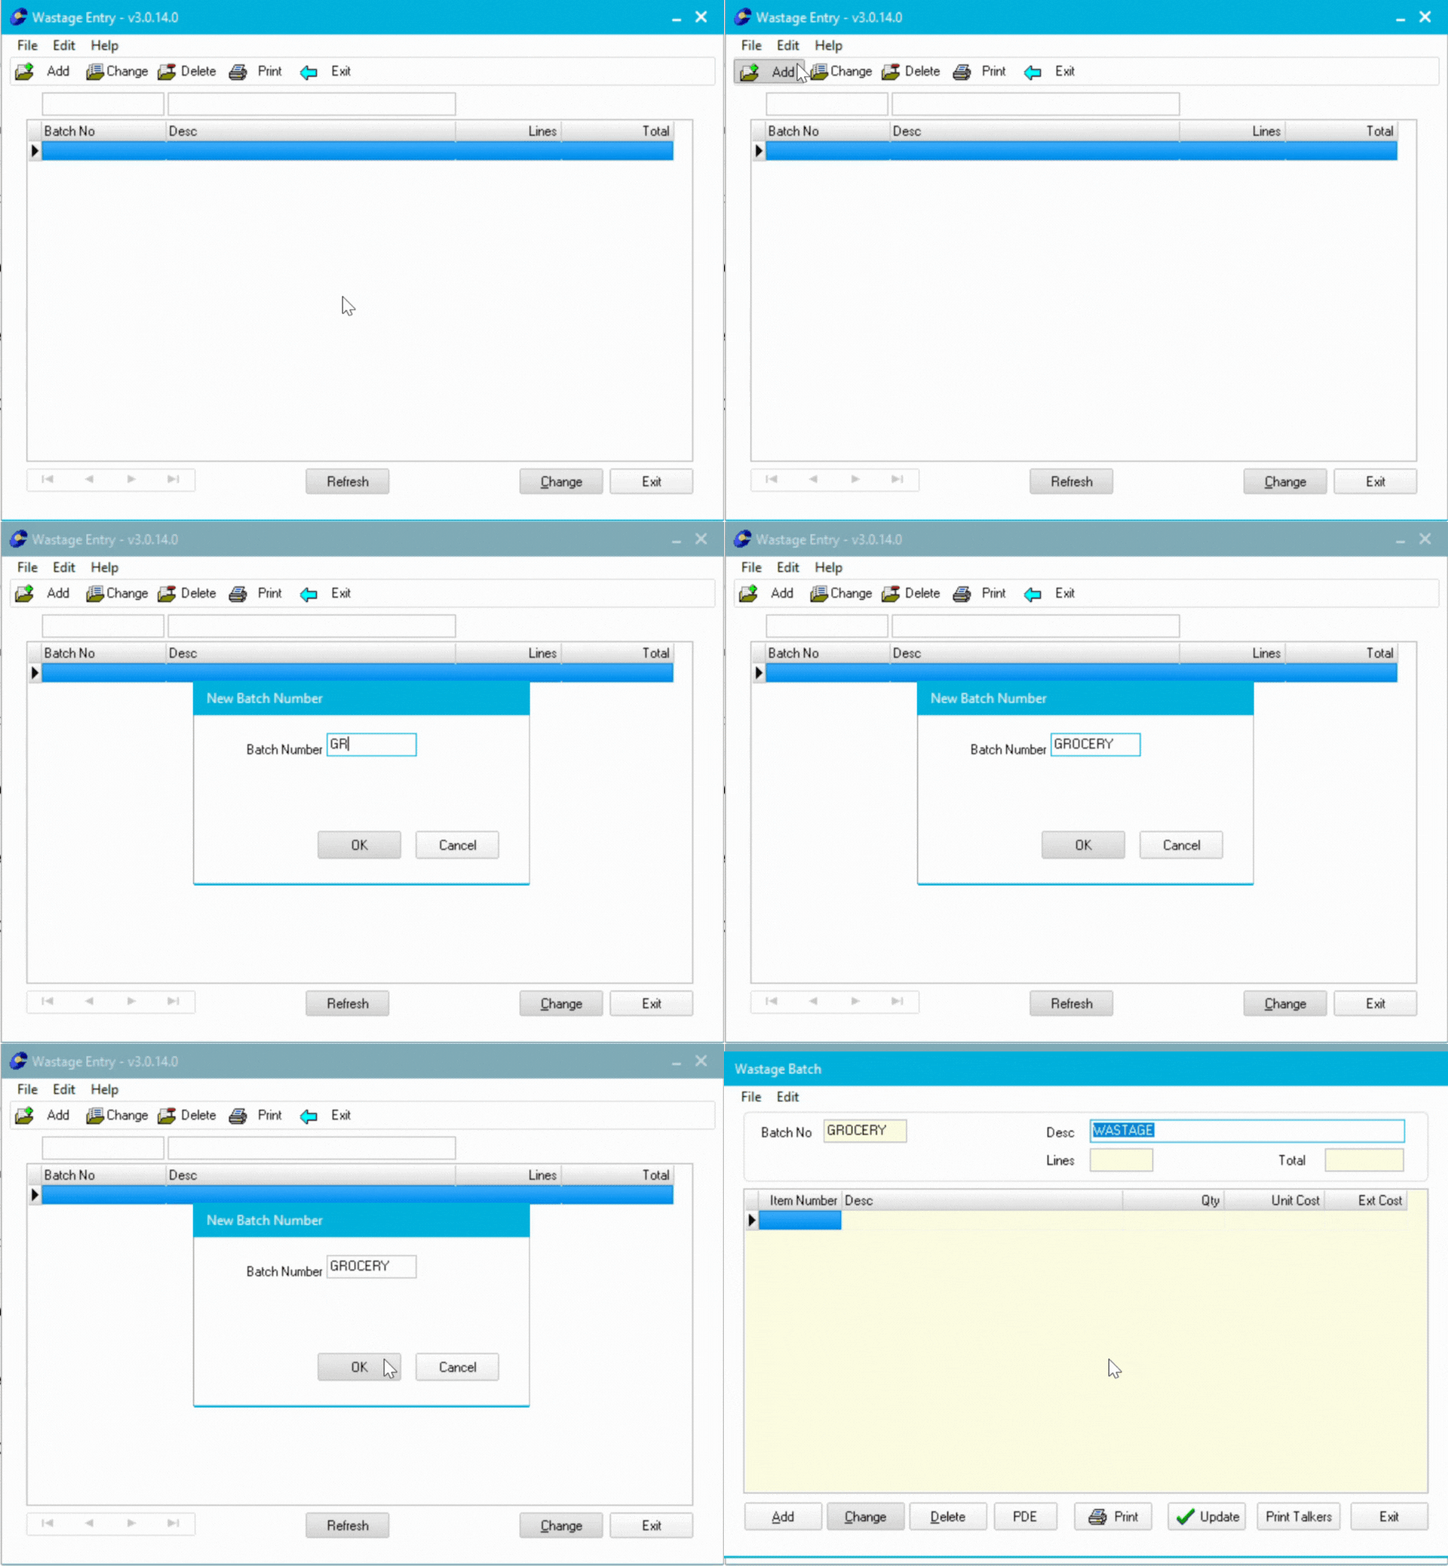
Select Add to start a new batch.
-
The New Batch Number window will appear.
-
Enter any batch name or number (e.g. GROCERY or WEEKLYWASTE), then click OK.

-
-
Add items to the batch
-
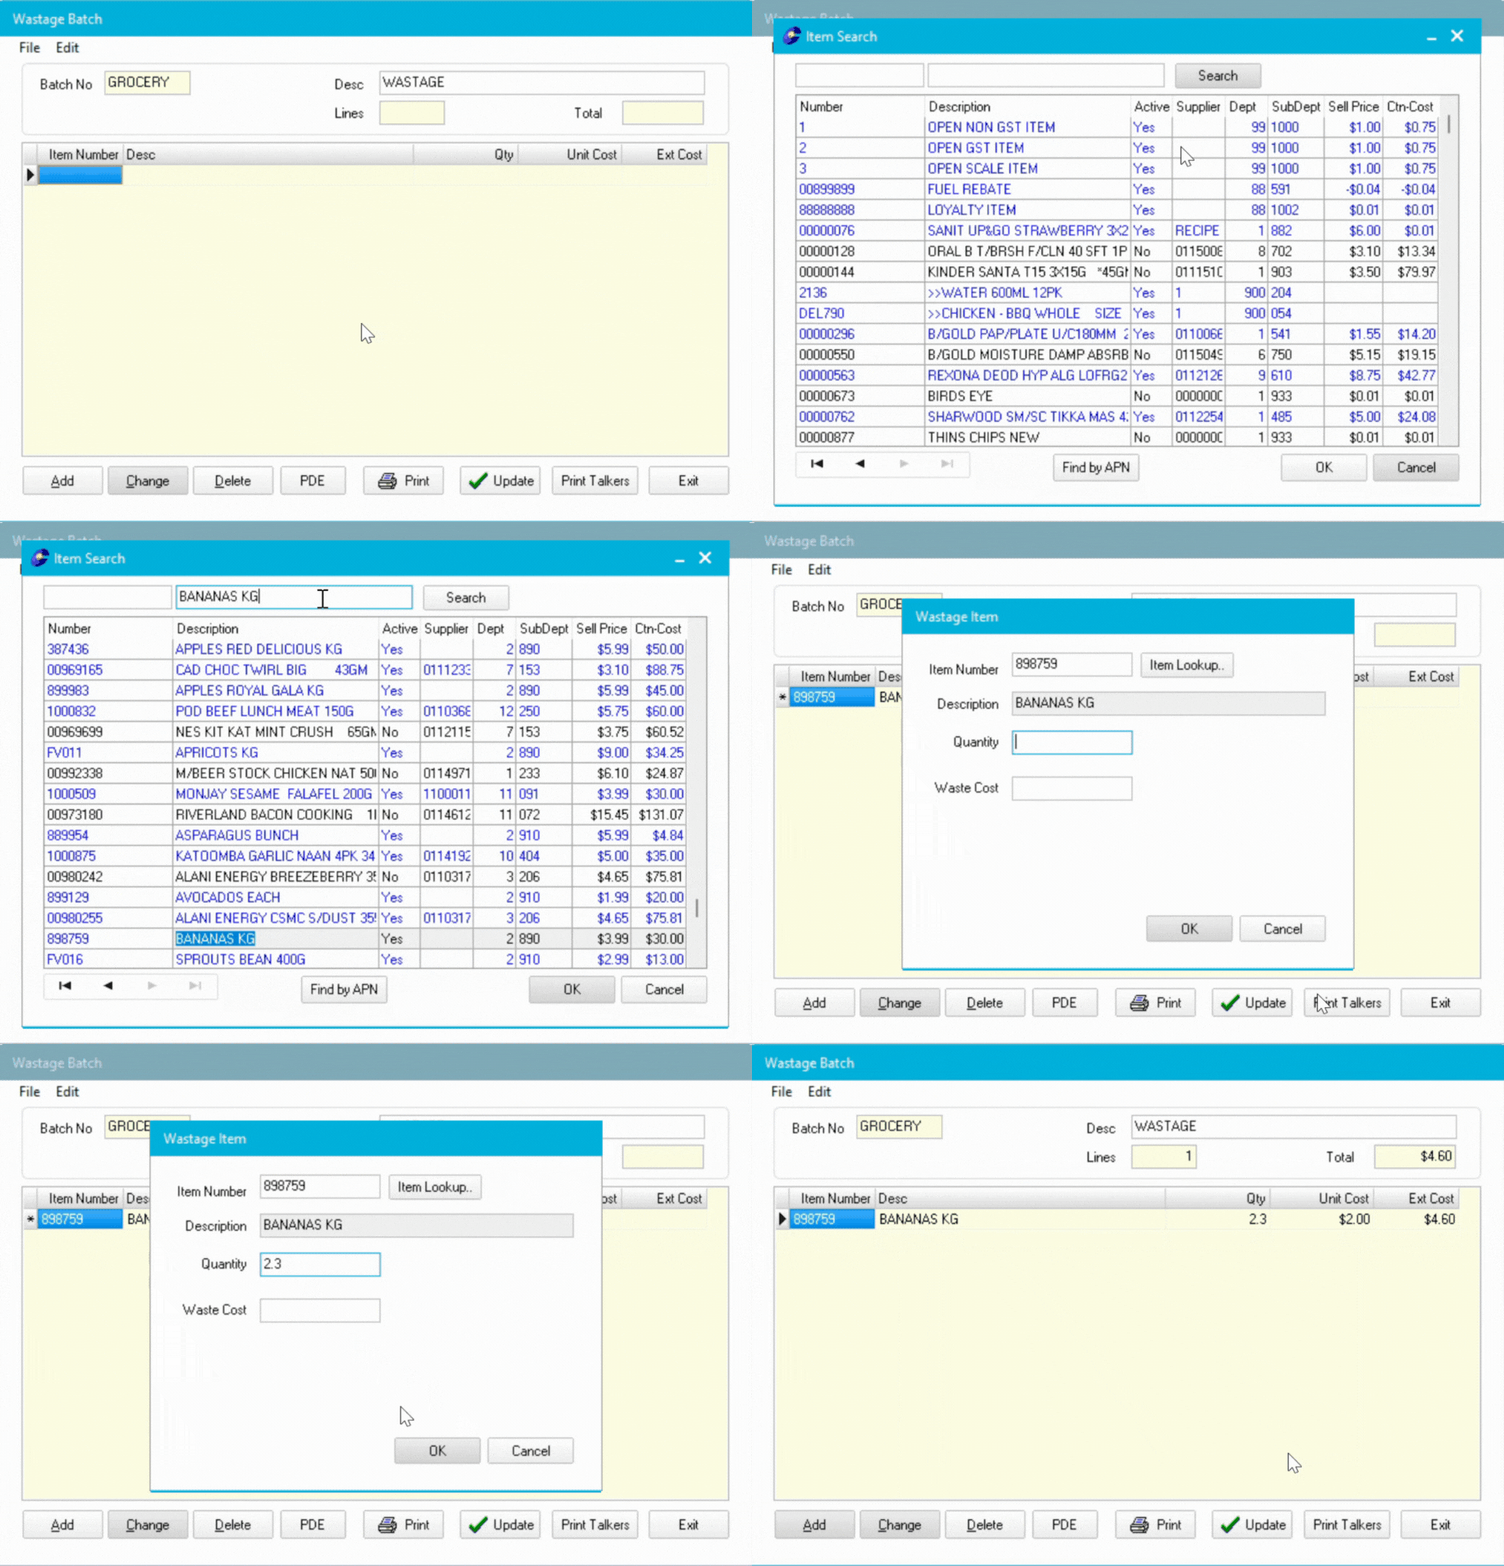
To enter items manually, click Add.
-
In the Wastage Item window, type the Item Number or use Item Lookup to search by description or barcode (APN).
-
Select the item and click OK.
-
Enter the Quantity of units wasted, then click OK twice to confirm.
-

💡 Tip:
You can also load items from your Convenience PDE.
If using a wireless PDE, close the batch completely before starting, then reopen it after scanning.
Review or edit items
-
Double-click an item or select it, then choose Change to adjust.
-
To remove an item, select it and click Delete.
-
(Optional) Click Print to preview the list before updating the batch.
How to update the batch
Once your wastage quantities are correct and you’ve finished reviewing:
-
Open your batch and click Update.
-
Confirm the Post To Day date is correct.
-
Click Update again to finalise.
-
When the confirmation message appears, click OK.

⚠️ Important:
Updating a batch will delete it automatically. Make sure all details are correct before you update.
✅ Once updated, your stock levels will be adjusted.
Why it matters
-
Keeps stock counts accurate
-
Ensures automatic ordering reflects true stock on hand
-
Prevents over-ordering due to unrecorded wastage
